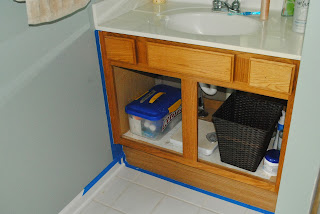
Instead of sanding and stripping each cabinet/frame/door, you follow this kit step by step. It ran around $65, but they said they have never had a complaint about it, and its the way to go. So, trusting them, we bought it. It comes with an instructional DVD I watched first, and then I followed along in the written guide as well.
"Before" pictures
Step one:
Remove doors from the frame and tape areas you want to stay clean (i.e. I tapped along the walls and the floor) Tip: Tape really well and really tight to the frame so it doesn't leak onto your wall)
Remove doors from the frame and tape areas you want to stay clean (i.e. I tapped along the walls and the floor) Tip: Tape really well and really tight to the frame so it doesn't leak onto your wall)
Step 2:
Deglosser. This is basically a liquid use you with a scratch pad and rub it really well over the whole frame and doors. It strips away all the finish that is already on the doors. It is really easy and doesn't take long to do. Let it dry for specified time before next step.
Step 3:
Paint. This is when you paint on your tinted base. Just like painting walls, you use a regular brush its not difficult. Just make sure you don't let it "goop" in the corners and let in "run" down. Let it dry specified time before next step.Tip: For the doors, it take a bit longer, because you can only do one side at a time - so paint one side, dry, flip and paint other side, dry. Finishing the doors takes the longest.
I chose the color Expresson, but there are about 20 different shades/colors you can choose from with the kit. You have them mix the color at Home Depot when you buy the kit.
Step 4:
Decorative Glaze. This step is optional. The glaze basically gives the cabinets a more "custom" look, pulling out the grains in each door instead of having just a flat painted look. I chose to do the glaze, and am so happy I did. You paint it on with a brush, and then immediately wipe it off with a rag provided. You have to let this step dry longer than the previous two before moving onto the last step.
Step 5:
Top Coat. Basically the protective coat so prevent scratching/peeling. Again, just use a brush and paint it on, letting it dry much longer (8 hours or more) before you can put your doors back on/drawers back in.
Honestly, it was really easy- just very time consuming. With to wait for each step to dry, it took me a good 5 days (although I could only work while the kids napped or at night- so I bet you could do it in 3 days if you could work non-stop.) It also takes long because of having to flip the doors and wait for each side to dry. For anyone wanting to refinish cabinets, I HIGHLY recommend the product and I am so happy with the outcome. Sometime in the future we hope re-do the floors (get rid of the white tile) and get new counters. Here is the finished product:
*Side note: This kit comes with quite a bit of product. I was able to do two vanities and a set of three drawers and still have enough to do the kids bathrooms (a double vanity sink) and our bathroom in the basement (a single vanity sink.) I think it is ideal to use for a kitchen with lots and lots of cabinets, but it works out great for us as I can now do all three bathrooms!


No comments:
Post a Comment